We will do our regular daily posts during the course to document what we do for those of you who might be thinking of doing it in the future.
First off, great piece in milanstyle.co.uk featuring us
http://www.milanstyle.co.uk/blog/mr-hare-shoesnob-carreducker/
Last week's post about tools proved very popular, so I am going to continue with it this week. I showed you last week the basics of a peripatetic shoemaker's tool kit, but without describing in any detail each tool.
So this week I am going make more detailed descriptions and give useful tips for those of you who are trying to create your own shoemaker's tool kit.
First up is the rest of my edge irons. As I said, I travel with a basic set, but have all the intermediate sizes and the very large and very small ones on a box, along with some extreme sized seat wheels - only brought out on the odd occasion.

So, some specifics. This is my fudge wheel. I bought this when I lived in Spain. Two things to look out for. One, the teeth on the wheel should be sharp and defined. Very old fudge wheels become worn and do not mark the stitches so well. Sharp teeth give a very defined mark on the welt. The other thing is the size. Most fudge wheels have the number of stitches to the inch marked.

Remember to look at the front edge too. New ones can be very sharp and will scratch the upper when you run it round the welt. If you have a sharp one, grind it a little with aluminium oxide paper to take the sharpness off.

What I love about my Spanish one is that it has two other different interchangeable wheels, so it is like three in one. Mine do 9, 12 and 15 stitches to the inch.

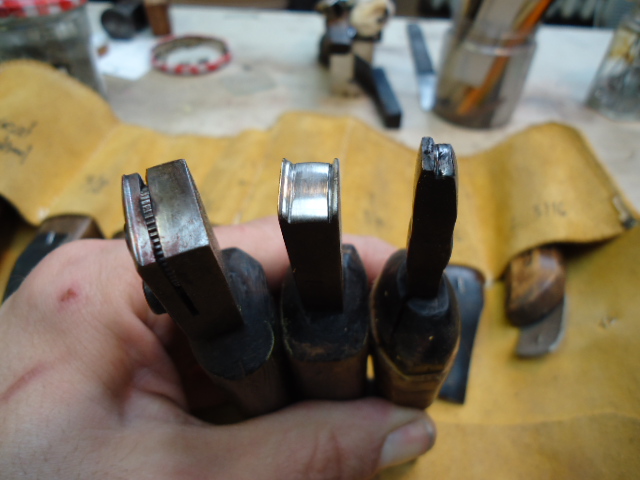
Ok, next is the plough, used for taking the lip off the insole and the welt after finishing, before you set the edges. Important to keep it sharp. I use the strop.

This is similar to the plough but is called a feathering knife and is used specifically for cutting the feather or holdfast. That 90 degree step part creates an even cut which is great for the welt to sit in.
PS Thank you to Marcell Mrsan who generously gave me this tool.


But, with both the plough and the feathering knife, you can do the same jobs with your knife. People spend endless amounts of money and energy collecting every tool under the sun, which, if that is what you are into, is fine, but lots of times, it is a total distraction. Your energy would be better spent making shoes and improving your skills. Using the knife well is the core skill of shoemaking and you are better getting good with it than spending time and money on the search for tools which often aren't available and, if they are, are of inferior quality. New tools don't cut it a lot of the time.
Next up is my very favourite Japanese rasp. These puppies really are the Rolls Royce of rasps. Small teeth which last for years. I've been using mine for at least 5 years and it is still amazing. Again, other new rasps I have found are rubbish!

Next up is the daddy, the knife. Nurture it, pour your love into it and keep it sharp! It is your best friend and sometimes, when blunt, your worst enemy.
We always put a leather sheath on it for comfort and to stop your hands getting black.
BIG TIP for those black fingers from the knife. It is water from your hands and the leather oxidising the steel. The answer is lemon juice or, even better, citric acid - it is like magic, honest!

Broken awl sharpened to make the groove in the channel for the stitches to sit in. Very important to stop the stitches showing through the sole.

From left to right, the seat wheel. Purely cosmetic little lines around the seat. Old ones are best. When they are cold, the wheel does not move, but warm them on the burner and it should start turning. If you have an old one, try taking out the screw, cleaning it and putting a drop of oil, then replacing it. Should do the trick. Note the position of thhe wheel before you start this process.
Next is the edge iron for setting the edges. Should be smooth and clean. There is a double lipped edge for the welt and a single lipped edge for the sole.
Last, a single lipped iron for setting the edges of the heel. I ground a regular edge iron on a grinding machine to make mine.
Waist irons for bevelled waists. Don't even go there unless you have someone there to teach you.

Right, you want to make shoes and you are buying old irons from Ebay, for example. Quite often,they will have been sitting in a garage or shed for years going rusty, like the ones below, so what do you do? They are salvageable.
Get some aluminium oxide paper and start polishing the surface - gently! Start with something like a 120 grit and work up to about a 240 or finer. Aim for a glassy, flawless finish.

Once the surface is clean and smooth, you need to work on the grooves - very important to get a good edge.
You will need a junior hacksaw blade like the one below. These are great for sorting out the grooves on the edge iron. Before you start though, you will need to flatten the blade on a lap iron because it has a zig zag form which will make the groove too wide. So just take the blade and hammer it on the flat surface of the iron. Then run it in the grooves and they will become smooth and deep - perfect!
 |
| Junior Hacksaw |
 |
| Junior Hacksaw Blade |
 |
| Lap Iron |
 |
| Hammer On This Surface |
And that is it for this week. Hope you enjoyed the post and look forward to more next Friday when we will be looking at other tools in the workshop . Until then, happy shoemaking!
Lovely post. I love seeing these tools.
ReplyDeleteThanks Li Sashay, good to hear from you. Best, jimmyshoe
ReplyDeleteHow do i purchase all the tools listed here. I really need them.
ReplyDeleteAdeolu Akintimehin, you can buy the tools at our webstore
ReplyDeletehttp://www.carreducker.com/shoemaking-tools
Best, James
Hi Jimmy, any idea where one might find a Japanese rasp like the one you are talking about?
ReplyDeleteIf one were to have only two fudge wheels which two would you recommend, mainly for mens shoes and boots.
Thank you for always being so accommodating and resourceful!
Another thing, are you looking or open to having an apprentice any time in the near future?
Kindest regards
Jean
Hello Jean, we get them at a shop in Tokyo called Otani but they don't have a website. You have to go in person. Liogier in France make them too. James
ReplyDelete